Wednesday, October 10, 2012

Create autoComplete Method Ajax in Cakephp

ref: http://book.cakephp.org/1.3/en/view/1358/AJAX
1.  You'll need to include the Ajax and Javascript helpers in your controller:

class PostsController extends AppController {
    var $name = 'Posts';
    var $helpers = array('Html','Ajax','Javascript');
    var $components = array( 'RequestHandler' );
}


2. Once you have the javascript in your controller, you can use javascript helper link() method to include Prototype and Scriptaculous in view/layout/default.ctp

echo $html->script('prototype');
echo $html->script('scriptaculous'); 


Download Prototype
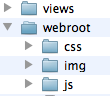
 - save it in /webroot/js/prototype.js
Download Scriptaculous
 - save all it in /webroot/js/
  

3. You need to set up a controller action that fetches and organizes the data you'll need for your list, based on user input:

#/app/controllers/posts_controller.php
function autoComplete() {
    //Partial strings will come from the autocomplete field as
    //$this->data['Post']['title']
    $this->set('posts', $this->Post->find('all', array(
                'conditions' => array(
                    'Post.title LIKE' => $this->data['Post']['title'].'%'
                ),
                'fields' => array('title')
    )));
    $this->layout = 'ajax';
}

4. Create app/views/posts/auto_complete.ctp that uses that data and creates an unordered list:

 <ul>
 <?php foreach($posts as $post): ?>
     <li><?php echo $post['Post']['title']; ?></li>
 <?php endforeach; ?>
</ul>


 5.  Finally, utilize autoComplete() in a view to create your auto-completing form field:

<?php echo $this->Form->create('Post', array('url' => '/posts/index')); ?>
    <fieldset>
         <legend><?php __('Search Post'); ?></legend>
    <?php echo $ajax->autoComplete('Post.title', '/posts/autoComplete')?>
    </fieldset>
<?php echo $this->Form->end(__('Find!!!', true));?> 


Once you've got the autoComplete() call working correctly, use CSS to style the auto-complete suggestion box. You might end up using something similar to the following:
div.auto_complete    {
     position         :absolute;
     width            :250px;
     background-color :white;
     border           :1px solid #888;
     margin           :0px;
     padding          :0px;
} 
li.selected    { background-color: #ffb; }

Sunday, September 16, 2012

Setting up Twitter Bootstrap with CakePHP

Bootstrap

Sleek, intuitive, and powerful front-end framework for faster and easier web development.

Step 1: Download CakePHP and Twitter Bootstrap

To get CakePHP, go to CakePHP.org an download the latest release and head over to the Bootstrap site to get it.

Step 2: Copy the Bootstrap files to CakePHP setup


Bootstrap css,img,javascript source to copy


Cake source css,img,js Directory


Step 3. Setup the CakePHP default template

In the CakePHP source, go into the Views->Layouts directory and open up the default.ctp.

Replace this code

<!DOCTYPE html>
<html lang="en">
<head>
  <?php echo $this->Html->charset(); ?>
  <title><?php echo $title_for_layout; ?></title>
  <!--  meta info -->
  <?php
    echo $this->Html->meta(array("name"=>"viewport",
      "content"=>"width=device-width,  initial-scale=1.0"));
    echo $this->Html->meta(array("name"=>"description",
      "content"=>"this is the description"));
    echo $this->Html->meta(array("name"=>"author",
      "content"=>"TheHappyDeveloper.com - @happyDeveloper"))
  ?>

  <!-- Le HTML5 shim, for IE6-8 support of HTML elements -->
  <!--[if lt IE 9]>
  <script src="http://html5shim.googlecode.com/svn/trunk/html5.js"></script>
  <![endif]-->

  <!-- styles -->
  <?php
    echo $this->Html->css('bootstrap');
    echo $this->Html->css('bootstrap-responsive');
    echo $this->Html->css('docs');
    echo $this->Html->css('prettify');
    
    echo $javascript->link(array(
            'jquery.js',
            'prettify.js',
            'bootstrap.js',
          
        ));
  ?>
  <!-- icons -->
  <?php
    echo  $this->Html->meta('icon',$this->webroot.'img/favicon.ico');
    echo $this->Html->meta(array('rel' => 'apple-touch-icon',
      'href'=>$this->webroot.'img/apple-touch-icon.png'));
    echo $this->Html->meta(array('rel' => 'apple-touch-icon',
      'href'=>$this->webroot.'img/apple-touch-icon.png',  'sizes'=>'72x72'));
    echo $this->Html->meta(array('rel' => 'apple-touch-icon',
      'href'=>$this->webroot.'img/apple-touch-icon.png',  'sizes'=>'114x114'));
  ?>
  <!-- page specific scripts -->
    <?php echo $scripts_for_layout; ?>
</head>

<body data-spy="scroll" data-target=".subnav" data-offset="50">
  <div id="container">
  <!-- Navbar ============================================= -->
  <div class="navbar navbar-fixed-top">
    <div class="navbar-inner">
      <div class="container">
        <a class="btn btn-navbar" data-toggle="collapse"
          data-target=".nav-collapse">
          <span class="icon-bar"></span>
          <span class="icon-bar"></span>
          <span class="icon-bar"></span>
        </a>
        <a class="brand" href="./index.html">Bootstrap</a>
        <div class="nav-collapse">
          <ul class="nav">
            <li class="active">
              <a href="<?php echo $this->webroot;?>">Home</a>
            </li>
            <li class="">
              <a href="./base-css.html">Base CSS</a>
            </li>
            <li class="">
              <a href="./components.html">Components</a>
            </li>
            <li class="">
              <a href="./javascript.html">Javascript plugins</a>
            </li>
            <li class="">
              <a href="./less.html">Using LESS</a>
            </li>
            <li class="divider-vertical"></li>
            <li class="">
              <a href="./download.html">Customize</a>
            </li>
            <li class="">
              <a href="./examples.html">Examples</a>
            </li>
          </ul>
        </div>
      </div>
    </div>
  </div>
  <div id="row">
    <?php echo $this->Session->flash(); ?>
    <?php echo $content_for_layout; ?>
  </div>
  </div>
  <?php echo $this->element('sql_dump'); ?>
</body>
</html>


Tuesday, August 14, 2012

Changing File Permissions

On computer filesystems, different files and directories have permissions that specify who and what can read, write, modify and access them.

Permission Modes 

The permission mode is computed by adding up the following values for the user, the file group, and for everyone else. The diagram shows how.
  • Read 4 - Allowed to read files
  • Write 2 - Allowed to write/modify files
  • eXecute1 - Read/write/delete/modify/directory 

Example Permission Modes

Mode Str Perms Explanation
0477 -r--rwxrwx owner has read only (4), other and group has rwx (7)
0677 -rw-rwxrwxowner has rw only(6), other and group has rwx (7)
0444 -r--r--r--all have read only (4)
0666 -rw-rw-rw-all have rw only (6)
0400 -r--------owner has read only(4), group and others have no permission(0)
0600 -rw-------owner has rw only, group and others have no permission
0470 -r--rwx---owner has read only, group has rwx, others have no permission
0407 -r-----rwxowner has read only, other has rwx, group has no permission
0670 -rw-rwx---owner has rw only, group has rwx, others have no permission
0607 -rw----rwxowner has rw only, group has no permission and others have rwx