Sunday, March 1, 2015

Dropdown Cakephp with Chained Selects Plugin for jQuery and Zepto

http://www.appelsiini.net/projects/chained

Basic setup for Chained Selects Plugin 

1. First you must include jQuery and Chained in your code:

<script src="//ajax.googleapis.com/ajax/libs/jquery/1.10.2/jquery.min.js"></script>
<script src="jquery.chained.min.js"></script>

2. Then lets assume you have the following HTML code:

<select id="mark" name="mark">
  <option value="">--</option>
  <option value="bmw">BMW</option>
  <option value="audi">Audi</option>
</select>
<select id="series" name="series">
  <option value="">--</option>
  <option value="series-3" class="bmw">3 series</option>
  <option value="series-5" class="bmw">5 series</option>
  <option value="series-6" class="bmw">6 series</option>
  <option value="a3" class="audi">A3</option>
  <option value="a4" class="audi">A4</option>
  <option value="a5" class="audi">A5</option>
</select>

3. You can now chain the #series to #mark. There are two different ways to do it. Choose yourself if you prefer more english like or shorter version. I prefer the shorter version.

$("#series").chained("#mark"); /* or $("#series").chainedTo("#mark"); */


Basic setup for Chained Selects Plugin in Cakephp

1. Make find('all') in any function of controller for custome dropdown

$states = array();
$country = $this->Application->Country->find('list');
$states_id = $this->Application->States->find('all');

//Custome dropdown states
foreach ($states_id as $key => $value) {
            $states[$key] = array(
                'name' => $value['State']['name'],
                'value' => $value['State']['id'],
                'class' => $value['State']['id'] //class like Chained format
}

$this->set(compact('country', 'states'));

2. Write Select Cakephp Helper From

echo $this->Form->input('country_id', array('empty'=>'--Select--'));            
echo $this->Form->input('state_id',  array(
     'type' => 'select','empty'=>'--Select--', 'options' => $states)
);

3. Write script on bottom of page
<script>
    $(function () {
      $("#ApplicationCountryId").chained("#ApplicationStateId"); 
   });
</script>

Thursday, August 14, 2014

Cakephp code with Count(*) AS Total

1. Create table with name : `activities`

CREATE TABLE IF NOT EXISTS `activities` (
  `id` int(11) NOT NULL AUTO_INCREMENT,
  `day` varchar(50) NOT NULL,
  `date` date NOT NULL,
  `week` varchar(10) NOT NULL,
  `month` varchar(10) NOT NULL,
  `year` varchar(10) NOT NULL,
  `created` datetime NOT NULL,
  `modified` datetime NOT NULL,
  PRIMARY KEY (`id`)
) ENGINE=MyISAM  DEFAULT CHARSET=latin1 AUTO_INCREMENT=4976 ; 

2. Data Sample : http://pastebin.com/3F41jEpU

3. Create function index in ActivitiesController

class ActivitiesController extends AppController {

    public function index() {
        $this->Activity->recursive = 0;        
        $activities = $this->Activity->find('all', array(
            'fields' => array('Activity.year', 'COUNT(*) AS total'),
            'group' => 'year',
            'order' => array('Activity.year' => 'DESC'),           
        ));       
        $this->set(compact('activities'));
    }


4. Create view for index.ctp

<table cellpadding="0" cellspacing="0">   
        <tr>
            <th><?php echo 'Year'; ?>&nbsp;</th>
            <th><?php echo 'Total'; ?>&nbsp;</th>              
        </tr>
        <?php foreach ($activities as $activity): ?>
            <tr>
                <td><?php echo h($activity['Activity']['year']); ?>&nbsp;</td>
                <td><?php echo h($activity[0]['total']); ?>&nbsp;</td>              
            </tr>
        <?php endforeach; ?>
    </table>

Output:

Sunday, September 22, 2013

Generate lft and rght values for a cakephp 2.0 tree


If you are using the Tree Behavior sometimes the lft and rght columns get out of sync, especially if you are adding and deleting records during development. Add the following method to your app/app_controller.php your choice.

1:  public function recover_tree() {  
2:      $modelClass = $this->modelClass;  
3:      $recovery = $this->$modelClass->recover();  
4:      if ($recovery) {  
5:        $this->Session->setFlash(__($modelClass . ' reordered.'), 'flash/success');  
6:        $this->redirect(array('action' => 'index'));  
7:      } else {  
8:        $this->Session->setFlash(__('Error recovering ' . $modelClass . ' tree'), 'flash/error');  
9:      }  
10:      exit;  
11:    }  

These methods/actions are meant to be called manually as you feel needed.
Examle : http://localhost/projects/categories/recover_tree


Saturday, August 31, 2013

Advanced CakePHP 2.x installation tutorial

In some situation you might want to develop many application CakePHP with share the same  Cake Libraries on your server filesystem.

In this tutorial I will try to show how to put your Cake libraries in shared location and share them with your apps in Linux or Windows.

1. Download the latest CakePHP 2.x, unzip it upload to share location.
In my tutorial I will be replacing the Cake libraries in
 
Linux:
/usr/share/cakephp2

Windows:
C:/cakephp2


2. Upload the APP folder and its content to your www/homepage root. You do not need to upload anything else.

3. Edit /app/webroot/index.php

Find:
define('CAKE_CORE_INCLUDE_PATH', ROOT . DS . 'lib');
 
Replace with:
 
#Linux 
define('CAKE_CORE_INCLUDE_PATH', DS.'usr'.DS.'share'.DS.'cakephp2'.DS.'lib');
 
#Windows
define('CAKE_CORE_INCLUDE_PATH','C:'.DS.'cakephp2'.DS.'lib');
 

And in all your other apps on the same server, edit the /app/webroot/index.php file and do the same. Rename app folder to your own project name.  Your CakePHP libraries are now shared, and can be utilized from all apps.

Twitter Bootstrap Typeahead with your CakePHP 1.3


In this post will explain how to integrate Twitter Bootstrap Typeahead with your CakePHP 1.3 application.
Make sure you have include jQuery, Bootstrap CSS and Bootstrap Javascript files in your CakePHP application. You can simply do it inside your default.ctp file.


For this example, we will create action index(), typeahead_search() in users_controller.php. We also create view for index.ctp and users_typeahead.ctp.

In this tutorial I’ll use Users controller. I’ll start by creating index() action, here is the code :

 public function index() {  
   //some code  
 }  
 
And here is the view :
1:  <div class="row">  
2:    <div class="span12">  
3:    <!-- Typeahead -->  
4:    <div class="pull-right">  
5:      <input type="text" data-provide="typeahead" id="user-typeahead">  
6:    </div>  
7:  //other code  
8:  </div>  

The next step is to create Javascript object in your layout file. So add this code snippet in your default.ctp file :
1:  <script type="text/javascript">  
2:    var site_url='<?php echo $this->base; ?>';  
3:  </script>  

This snippet of code will create Javascript object which contains the root URL path of CakePHP.
After we have the Javascript object variable, let’s continue by creating the Javascript code. Inside your application Javascript file add these code :

1:  $('#user-typeahead').typeahead({  
2:   source: function (query, process) {  
3:    return $.ajax({  
4:     url: site_url + 'users/typeahead_search',  
5:     type: 'get',  
6:     data: {q: query},  
7:     dataType: 'json',  
8:     success: function (json) {  
9:      return process(json);  
10:     }  
11:    });  
12:   }  
13:  });  

In this code, we initialize the typeahead library and create AJAX request to the typeahead_search action. In the next step, we will create typeahead_search action that will handle AJAX request and return JSON result. Back to our users controller, create the typeahead action which will contain this code :


1:  class UsersController extends AppController {  
2:  var $components = array('RequestHandler');  
3:  public function typeahead_search() {  
4:    if($this->RequestHandler->isAjax())  
5:    $this->RequestHandler->respondAs('json');  
6:    // get the search term from URL  
7:    $term = $this->request->query['q'];  
8:    $users = $this->User->find('all',array(  
9:      'conditions' => array(  
10:        'User.username LIKE' => '%'.$this->params['url']['q'].'%'  
11:      )  
12:    ));  
13:    // Format the result for select2  
14:    $result = array();  
15:    foreach($users as $key => $user) {  
16:      array_push($result, $user['User']['username']);  
17:    }  
18:    $users = $result;  
19:    echo json_encode($users);  
20:  }  
21:  }  

This action will receive the request, search the database for relevant result and return it on JSON format.

Ref Site : http://www.rudylee.com/cbunny2/


Sunday, June 16, 2013

Pagination With Twitter Bootstrap and CakePHP

Pagination element for CakePHP like twitter bootstrap


Code:
 <div class="pagination">  
  <ul>  
   <?php  
   echo ($this->Paginator->current() > 3) ? $this->Paginator->first('first ', array('tag' => 'li')) : '';  
   echo ($this->Paginator->hasPrev()) ? $this->Paginator->prev(__('prev ', true),  
      array('tag' => 'li', 'id' => 'prev' . rand(2, 9000)), null, array('escape' => false)) : '';  
   echo $this->Paginator->numbers(array('modulus' => 7, 'separator' => ' ', 'tag' => 'li'));  
   echo ($this->Paginator->hasNext()) ? $this->Paginator->next(__(' next', true),  
     array('tag' => 'li'), null, array('escape' => false)) : '';  
   echo ((int) $this->Paginator->counter(array('format' => '%pages%')) > 10) ?  
     $this->Paginator->last('last', array('tag' => 'li')) : '';  
   echo $this->Js->writeBuffer();  
   ?>  
  </ul>  
  </div>  

Thursday, May 16, 2013

Using CakePHP FormHelper with Bootstrap Forms

CakePHP's FormHelper helpt to generate forms when making CakePHP applications. As one might assume, this includes generating input elements, like example:

 <form action="">  
 <fieldset>  
 <div class="control-group required error">  
   <label for="Fieldname" class="control-label">Fieldname</label>  
   <div class="controls">  
     <input name="data[Fieldname]" class="form-error" maxlength="255" type="text" value="" id="Fieldname"/>  
     <span class="help-inline">Error message</span>  
   </div>  
 </div>  
 </fieldset>  
 </form>  

The CakePHP code is:


 <?php echo $this->Form->create('ModelName', array(  
   'class' => 'form-horizontal',  
   'inputDefaults' => array(  
     'format' => array('before', 'label', 'between', 'input', 'error', 'after'),  
     'div' => array('class' => 'control-group'),  
     'label' => array('class' => 'control-label'),  
     'between' => '<div class="controls">',  
     'after' => '</div>',  
     'error' => array('attributes' => array('wrap' => 'span', 'class' => 'help-inline')),  
   )));?>  
 <fieldset>  
 <?php echo $this->Form->input('Fieldname1', array(  
   'label' => array('class' => 'control-label','text'=>'HERE YOU LABEL TEXT')  
   )); ?>  
 <?php echo $this->Form->input('Fieldname2', array(  
   'label' => array('class' => 'control-label','text'=>'HERE YOU LABEL TEXT')  
   )); ?>  
 </fieldset>   
 <?php echo $this->Form->end();?>  

Saturday, May 4, 2013

Bootstrap Typeahead CakePHP 2.0

Integrate Twitter Bootstrap Typeahead with your CakePHP 2.0 application.
You need:
- Cakephp 2.x
- Jquery
- Twitter bootstrap

First the form:
<input data-provide="typeahead" id="user-typeahead" type="text" />

Setting your url base
Put it into default.ctp before </head>
<script type="text/javascript">
  //get url base app
  var site_url='<?php echo $this->base; ?>';

</script>

The Jquery:
Put it into bottom in view

<script>  
$( document ).ready( function(){        
            $('#user-typeahead').typeahead({
                source: function (query, process) {
                    return $.ajax({
                        url: site_url+'/users/typeahead_search',
                        type: 'get',
                        data: {q: query},
                        dataType: 'json',
                        success: function (json) {
                            return process(json);
                        }
                    });
                }
            });  

 });                      
 </script>


UsersController
    public function typeahead_search() {
        $this->autoRender = false;
        $this->RequestHandler->respondAs('json');

        // get the search term from URL
        $term = $this->request->query['q'];
        $users = $this->User->find('all', array(
            'conditions' => array(
                'User.username LIKE' => '%' . $term . '%'
            )
                ));

        // Format the result for input
        $result = array();
        foreach ($users as $key => $user) {
            array_push($result, $user['User']['username']);
        }
        $users = $result;

        echo json_encode($users);
    }


This action will receive the request, search the database for relevant result and return it on JSON format.

Thursday, February 14, 2013

Upload single image or file using Cakephp 1.3

This tutorial for upload image or file using Cakephp 1.3.

Step 1 : Create table name 'uploads'

CREATE TABLE `uploads` (
 `id` CHAR(36) NOT NULL PRIMARY KEY,
 `title` VARCHAR(45) NOT NULL,
 `description` TEXT,
 `filename` VARCHAR(255) NOT NULL,
 `filesize` INT(11) UNSIGNED NOT NULL DEFAULT 0,
 `filemime` VARCHAR(45) NOT NULL DEFAULT 'text/plain',
 `created` DATETIME,
 `modified` DATETIME
);

Step 2 : Create view for 'uploads'
path : /views/uploads/add.ctp

<?php echo $this->Form->create(‘Upload’, array(‘type’ => ‘file’));?>
  <fieldset>
     <legend><?php __(‘Add Upload’); ?></legend>
  <?php
  echo $this->Form->input(‘title’);
  echo $this->Form->input(‘description’);
  echo $this->Form->input(‘file’, array(‘type’ => ‘file’));
  ?>
  </fieldset>
<?php echo $this->Form->end(__(‘Submit’, true));?>

Step 3 : Create controller 'uploads_controller'
path : /controllers/uploads_controller.php

Step 3.1 : create function add()

function add() {
  if (!empty($this->data)) {
   $this->Upload->create();
            if ($this->uploadFile() && $this->Upload->save($this->data)) 
{
                $this->Session->setFlash(__('The upload has been saved', true));
                $this->redirect(array('action' => 'index'));
            } else {
                $this->Session->setFlash(__('The upload could not be saved. Please, try again.', true));
            }
        }
    }


Step 3.2 :create function uploadFile()
path : /webroot/uploads
make sure create folder 'upload' in webroot and permission access to this folder


function uploadFile() {
  $file = $this->data[‘Upload’][‘file’];
  if ($file[‘error’] === UPLOAD_ERR_OK) {
    $id = String::uuid();
    if (move_uploaded_file($file[‘tmp_name’], APP.’webroot/uploads’.DS.$id)) {
      $this->data[‘Upload’][‘id’] = $id;
      $this->data[‘Upload’][‘filename’] = $file[‘name’];
      $this->data[‘Upload’][‘filesize’] = $file[‘size’];
      $this->data[‘Upload’][‘filemime’] = $file[‘type’];
      return true;
    }
  }
  return false;
}

Step 4 : Create view and function for download

i. create view index.ctp
path : /views/uploads/index.ctp

<h2><?php __('Upload'); ?></h2>
<table cellpadding="0" cellspacing="0">
    <tr>
        <th><?php __('id'); ?></th>
        <th><?php __('title'); ?></th>
        <th><?php __('download'); ?></th>
    </tr>
    <?php foreach ($uploads as $upload): ?>
        <tr>
            <td><?php echo $upload['Upload']['id']; ?>&nbsp;</td>
            <td><?php echo $upload['Upload']['title']; ?>&nbsp;</td>
            <td>
                <?php
                echo $this->Html->link(__('Download', true), array(
                    'action' => 'download', $upload['Upload']['id']));
                ?>&nbsp;</td>
        </tr>
    <?php endforeach; ?>
</table>
 
ii. create function download in uploads_controller.php

 
function download($id = null) {
        if (!$id) {
            $this->Session->setFlash(__('Invalid id for upload', true));
            $this->redirect(array('action' => 'index'));
        }
        $upload = $this->Upload->find('first', array(
            'conditions' => array(
                'Upload.id' => $id,
            )
                ));
        if (!$upload) {
            $this->Session->setFlash(__('Invalid id for upload', true));
            $this->redirect(array('action' => 'index'));
        }
        $this->view = 'media';
        $filename = $upload['Upload']['filename'];
        $this->set(array(
            'id' => $upload['Upload']['id'],
            'name' => substr($filename, 0, strrpos($filename, '.')),
            'extension' => substr(strrchr($filename, '.'), 1),
            'path' => APP . 'webroot/uploads' . DS,
            'download' => true,
        ));
    }

Extra : Show image in view.ctp
path : /views/uploads/view.ctp

$id = $upload['Upload']['id'];
echo '<img src="'.$this->Html->url(array('controller' => 'uploads','action' => 'download',$id)).'"/>'; 

Wednesday, October 10, 2012

Create autoComplete Method Ajax in Cakephp

ref: http://book.cakephp.org/1.3/en/view/1358/AJAX
1.  You'll need to include the Ajax and Javascript helpers in your controller:

class PostsController extends AppController {
    var $name = 'Posts';
    var $helpers = array('Html','Ajax','Javascript');
    var $components = array( 'RequestHandler' );
}


2. Once you have the javascript in your controller, you can use javascript helper link() method to include Prototype and Scriptaculous in view/layout/default.ctp

echo $html->script('prototype');
echo $html->script('scriptaculous'); 


Download Prototype
 - save it in /webroot/js/prototype.js
Download Scriptaculous
 - save all it in /webroot/js/
  

3. You need to set up a controller action that fetches and organizes the data you'll need for your list, based on user input:

#/app/controllers/posts_controller.php
function autoComplete() {
    //Partial strings will come from the autocomplete field as
    //$this->data['Post']['title']
    $this->set('posts', $this->Post->find('all', array(
                'conditions' => array(
                    'Post.title LIKE' => $this->data['Post']['title'].'%'
                ),
                'fields' => array('title')
    )));
    $this->layout = 'ajax';
}

4. Create app/views/posts/auto_complete.ctp that uses that data and creates an unordered list:

 <ul>
 <?php foreach($posts as $post): ?>
     <li><?php echo $post['Post']['title']; ?></li>
 <?php endforeach; ?>
</ul>


 5.  Finally, utilize autoComplete() in a view to create your auto-completing form field:

<?php echo $this->Form->create('Post', array('url' => '/posts/index')); ?>
    <fieldset>
         <legend><?php __('Search Post'); ?></legend>
    <?php echo $ajax->autoComplete('Post.title', '/posts/autoComplete')?>
    </fieldset>
<?php echo $this->Form->end(__('Find!!!', true));?> 


Once you've got the autoComplete() call working correctly, use CSS to style the auto-complete suggestion box. You might end up using something similar to the following:
div.auto_complete    {
     position         :absolute;
     width            :250px;
     background-color :white;
     border           :1px solid #888;
     margin           :0px;
     padding          :0px;
} 
li.selected    { background-color: #ffb; }

Sunday, September 16, 2012

Setting up Twitter Bootstrap with CakePHP

Bootstrap

Sleek, intuitive, and powerful front-end framework for faster and easier web development.

Step 1: Download CakePHP and Twitter Bootstrap

To get CakePHP, go to CakePHP.org an download the latest release and head over to the Bootstrap site to get it.

Step 2: Copy the Bootstrap files to CakePHP setup


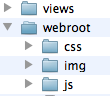
Bootstrap css,img,javascript source to copy


Cake source css,img,js Directory


Step 3. Setup the CakePHP default template

In the CakePHP source, go into the Views->Layouts directory and open up the default.ctp.

Replace this code

<!DOCTYPE html>
<html lang="en">
<head>
  <?php echo $this->Html->charset(); ?>
  <title><?php echo $title_for_layout; ?></title>
  <!--  meta info -->
  <?php
    echo $this->Html->meta(array("name"=>"viewport",
      "content"=>"width=device-width,  initial-scale=1.0"));
    echo $this->Html->meta(array("name"=>"description",
      "content"=>"this is the description"));
    echo $this->Html->meta(array("name"=>"author",
      "content"=>"TheHappyDeveloper.com - @happyDeveloper"))
  ?>

  <!-- Le HTML5 shim, for IE6-8 support of HTML elements -->
  <!--[if lt IE 9]>
  <script src="http://html5shim.googlecode.com/svn/trunk/html5.js"></script>
  <![endif]-->

  <!-- styles -->
  <?php
    echo $this->Html->css('bootstrap');
    echo $this->Html->css('bootstrap-responsive');
    echo $this->Html->css('docs');
    echo $this->Html->css('prettify');
    
    echo $javascript->link(array(
            'jquery.js',
            'prettify.js',
            'bootstrap.js',
          
        ));
  ?>
  <!-- icons -->
  <?php
    echo  $this->Html->meta('icon',$this->webroot.'img/favicon.ico');
    echo $this->Html->meta(array('rel' => 'apple-touch-icon',
      'href'=>$this->webroot.'img/apple-touch-icon.png'));
    echo $this->Html->meta(array('rel' => 'apple-touch-icon',
      'href'=>$this->webroot.'img/apple-touch-icon.png',  'sizes'=>'72x72'));
    echo $this->Html->meta(array('rel' => 'apple-touch-icon',
      'href'=>$this->webroot.'img/apple-touch-icon.png',  'sizes'=>'114x114'));
  ?>
  <!-- page specific scripts -->
    <?php echo $scripts_for_layout; ?>
</head>

<body data-spy="scroll" data-target=".subnav" data-offset="50">
  <div id="container">
  <!-- Navbar ============================================= -->
  <div class="navbar navbar-fixed-top">
    <div class="navbar-inner">
      <div class="container">
        <a class="btn btn-navbar" data-toggle="collapse"
          data-target=".nav-collapse">
          <span class="icon-bar"></span>
          <span class="icon-bar"></span>
          <span class="icon-bar"></span>
        </a>
        <a class="brand" href="./index.html">Bootstrap</a>
        <div class="nav-collapse">
          <ul class="nav">
            <li class="active">
              <a href="<?php echo $this->webroot;?>">Home</a>
            </li>
            <li class="">
              <a href="./base-css.html">Base CSS</a>
            </li>
            <li class="">
              <a href="./components.html">Components</a>
            </li>
            <li class="">
              <a href="./javascript.html">Javascript plugins</a>
            </li>
            <li class="">
              <a href="./less.html">Using LESS</a>
            </li>
            <li class="divider-vertical"></li>
            <li class="">
              <a href="./download.html">Customize</a>
            </li>
            <li class="">
              <a href="./examples.html">Examples</a>
            </li>
          </ul>
        </div>
      </div>
    </div>
  </div>
  <div id="row">
    <?php echo $this->Session->flash(); ?>
    <?php echo $content_for_layout; ?>
  </div>
  </div>
  <?php echo $this->element('sql_dump'); ?>
</body>
</html>


Tuesday, August 14, 2012

Changing File Permissions

On computer filesystems, different files and directories have permissions that specify who and what can read, write, modify and access them.

Permission Modes 

The permission mode is computed by adding up the following values for the user, the file group, and for everyone else. The diagram shows how.
  • Read 4 - Allowed to read files
  • Write 2 - Allowed to write/modify files
  • eXecute1 - Read/write/delete/modify/directory 

Example Permission Modes

Mode Str Perms Explanation
0477 -r--rwxrwx owner has read only (4), other and group has rwx (7)
0677 -rw-rwxrwxowner has rw only(6), other and group has rwx (7)
0444 -r--r--r--all have read only (4)
0666 -rw-rw-rw-all have rw only (6)
0400 -r--------owner has read only(4), group and others have no permission(0)
0600 -rw-------owner has rw only, group and others have no permission
0470 -r--rwx---owner has read only, group has rwx, others have no permission
0407 -r-----rwxowner has read only, other has rwx, group has no permission
0670 -rw-rwx---owner has rw only, group has rwx, others have no permission
0607 -rw----rwxowner has rw only, group has no permission and others have rwx


Friday, December 23, 2011

Captcha component with Securimage

Securimage is an open-source free PHP CAPTCHA script for generating complex images and CAPTCHA codes to protect forms from spam and abuse. It can be easily added into existing forms on your website to provide protection from spam bots. It can run on most any webserver as long as you have PHP installed, and GD support within PHP. Securimage does everything from generate complicated CAPTCHA images to making sure the code the user entered was correct.

Read More at this link 

Tuesday, December 13, 2011

Transparent DatePicker with jquery

We will create an extended Helper FormHelper, without Difficulty to add a calendar date picker style in jquery (http://www.kelvinluck.com/assets/jquery/datePicker/v2/demo/).


Read more article from this link

Sunday, October 23, 2011

CakePHP support in NetBeans

NetBeans is a very powerful development environment for many languages including PHP. With the release of its latest version, NetBeans announced full support for symfony PHP framework. NetBeans can also support many other PHP frameworks and libraries although it is not officially supported by NetBeans. This support needs some effort to enable some tools specially auto-complete, or intellisense, which saves a lot of time for developers.

http://www.tiplite.com/cakephp-support-in-netbeans/

Using CakePHP with Aptana

  • From the Window menu, select Preferences…, and then choose General > Editors > File Associations.
  • Add the appropriate file type.
  • Next to the File Types list, click the Add button.
  • In the New File Type pop-up window, type the appropriate file extension (e.g. “.ctp” or “.thtml”).
  • Click OK to add the New File Type to the List.
  • Associate the new file type with Aptana.
  • On the File Types list, select the file type that you just added.
  • Next to the Editor Associations list, click the Add button.
  • On the Editor Selection pop-up window, select the editor that you want to associate with your file type.
  • Click OK to add the editor.
  • The new is now associated with the specified file type.
  • Click OK to apply your changes and close the Preferences window.

CakePHP and Dreamweaver

  • Go to your Dreamweaver installation folder (let’s assume this is C:\Program Files\Adobe\Adobe Dreamweaver CS3)
  • Open the configuration folder
  • Edit extensions.txt and modify the first line so THTML and CTP are present (comma seperated. It should look something like this: ,MASTER,THTML,CTP:All Documents
  • Edit the PHP files line in the same way. It should look like this: PHP,PHP3,PHP4,PHP5,TPL,THTML,CTP:PHP Files
  • Now browse to the DocumentTypes folder and open MMDocumentTypes.xml.
  • Do a ctrl-f search for “winfileextension” and modify the line to look like this: winfileextension=”php,php3,php4,php5,thtml,ctp”
  • Do the same for “macfileextension”: macfileextension=”php,php3,php4,php5,thtml,ctp”
  • Now go to your “Document and Settings” folder (found under your username e.g. “C:\Documents and Settings\Your User Name\Application Data\Adobe\Dreamweaver 9\Configuration”
  • Edit “Extensions.txt” and add the same lines you added to the other extensions file.

CakePHP and Eclipse

To set up your version of Eclipse to read either file type, follow these steps:
  • Go to Window > Preferences > General > Content types
  • In the content types window navigate the tree to text > PHP content type
  • Click add
  • Enter *.ctp or *.thtml depending on what version of CakePHP you use. It might be best to add both – just in case.
  • Now navigate to Editors > File Associations
  • Enter *.ctp or *.thtml depending on what version of CakePHP you use.
  • Under “Associated Editors:”, select the PHP Editor and click Default.

Tuesday, July 12, 2011

7 Best Shopping Cart Plugins For CakePhp

1. VaM Cart

Easy Installation.
SEO – Search Engine Optimization.
Unlimited Categories, Products.
CakePHP, MVC, Smarty.
Multi Language, Multi Currency.
Templatable.
Open Source.
Automatic Image Resize.
Product Reviews.
Coupons…

2. ShoppingCart plugin for CakePHP (techno-geek Shopping Cart)

Authors: Dean Sofer (ProLoser), Jesse Adams (techno-geek)

CakePHP plugin that handles the management of order data in the session. Useful for shopping cart CakePHP applications. Will be used in the Mocha Shopping Cart project brought to you by DualTech Services, inc.
3. cakecart

CakeCart is a shopping cart built on-top of the cakePHP framework. Currently in the pre-pre-alpha stage. Its purpose will be to allow anybody familiar with the cakePHP framework to customize and easily launch an e-commerce website. Currently has authorize.net support and later scheduled to add in paypal and google checkout support.

To install: Import db.sql into desired database.
Change app/config/database.php
Configure app/config/cart.php
Configure authorize.net at app/config/authorize.php
Access admin in /admin url and use username: demo@demo.com and password: demo

4. bakesale Shopping cart

Made with the MVC Web framework CakePHP. Uses the jQuery JavaScript library, both for effects and AJAX.

Using the Plug-ins, the end-developer can simply add new functionality to BakeSale.

The application follows Web standards, using semantic XHTML markup with CSS-based layout.

5. CakePHP-Cart

This is an attempt to become the defacto solution for shopping cart implementation in CakePHP. Not to say this in of itself will be the best shopping cart around, but in fact give developers the resource to build their own custom shopping cart Application to their own specifications.

Hopefully future versions of the brother development app, ‘Mocha’ will use future releases of this plugin as a part of it’s core. For now this is a 1-stop plugin that provides you all the resources you need to build a cart and nothing more, allowing you to extrapolate from that point forwards.
6. flashub.com

[This Project is POSTPONED] e-junkie clone but more features provided to independent software and php script vendors. E-junkie is a shopping cart for downloadable goods. Built using cakephp.

7. kaching-php

Kaching is a shopping cart framework built as a CakePHP plugin. It is a platform developers can use create customized onlines stores.

Kaching came from a frustration of trying to use pre-built shopping cart systems that were hard to customized and locked you into doing it their way. They didn’t seem to understand that not all online stores fit into the same mold.

CakePHP was chosen to be the framework to build on, because frankly we think it’s pretty awesome.

Kaching is not for everyone. It is strictly for developer who want to build a online store and maintain full control of it. Kaching comes with a sample store, as a starting point and examples on how to use it. Then the rest it up to you.

From reading of the CakePHP groups, it is quite evident that there are lots of people trying to implement a online store using CakePHP. Kaching hopes that it can fill a gap where people don’t have to keep on starting from scratch when building their online store.

Monday, July 11, 2011

Introduction to CakePHP for newbies

David Golding has started to write an introductory book for CakePHP with the title “The newbie’s introduction to CakePHP”. As the title indicates, the book is aimed at newbies and so it covers the first steps with CakePHP. It is not completed yet, but I think it will become a great addition to the manual.

You can download a preview of the book as a PDF from David Golding’s website: http://www.davidgoldingdesign.com/newbie-cakephp.pdf.